How to Tie Running Shoes: Lacing Techniques
Updated: August 13, 2024 by Caroline Cross

You have come a long way since mastering the bunny ears lacing method when you were a kid, but when it comes to tying your shoelaces for running, it's time to elevate your technique! Especially if you are experiencing any discomfort or issues with your feet despite wearing the right shoe size and fit.
The standard criss-cross lacing straight out of the box may work for some, but as runners, we have all fallen victim to heel slippage, blisters, hot spots, or a bruised toenail or two. Did you know that different shoe-lacing techniques can help resolve these issues? From the runner's loop and parallel lacing to bruised toe and hot spot lacing styles, check out our step-by-step guide with tips and tricks on how to optimize your comfort and fit with the shoes you already have.
The Runner's Loop
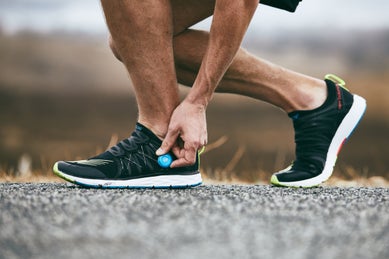
Fix: Heel Sliding, Moving Around or Popping Out of Shoe
One telltale sign that your heel is moving around too much is excessive wear inside the back of your shoe. If you feel your heel is slipping out of your shoe when running, try the runner's loop lacing method for a secure hold. As one of the most popular lacing techniques, the runner's loop, also known as the "heel lock," helps avoid blisters by preventing your foot from sliding forward as you run. The loops on the laces tighten the heel collar to limit excess movement and keep the heel locked in, so you're ready to hit the ground running.
|
How to Tie: Runner's Loop Step 1. Lace the shoe normally until the next-to-last eyelets on either side. Step 2. Draw the laces backward through the last eyelet to create loops on the outside of the shoe. Step 3. Cross each lace back across the tongue and through the opposite loop. |
Parallel Lacing
Fix: Tight Pressure Points Across Foot
While running shoes should have a snug fit, they should also have some give. If your shoe feels too tight, try this parallel "ladder" lacing style for easing tension. Threading the laces in a straight, horizontal bar pattern helps minimize the pressure on top of your foot while offering a secure hold so you feel more comfortable. The parallel lacing method is also beneficial for those with high insteps or higher arches, providing better support and more breathing room.
|
How to Tie: Parallel Lacing Technique Step 1. Completely remove the lace from the shoe. Step 2. Lace the first two eyelets by your big toe. Step 3. Pull the lace from the first eyelet straight across the tongue to the parallel eyelet. Step 4. Once through this eyelet, bring the lace up the shoe, skipping one eyelet. Step 5. Repeat these steps until the laces reach the top of the tongue. |
Bruised Toe Lacing
Fix: Bruised or Sore Toes from Tight Toe Box
If you have a bruised toe or your big toenail has turned black, you can take some pressure off the toe with this lacing trick. The diagonal lacing can help open up some space for the toe box, preventing your feet from sliding and giving you some wiggle room.
Bruised toes can also occur from your shoes being too short, in which case you need a properly fitted running shoe that comfortably covers the length of your feet with sufficient room for toe splaying.
|
How to Tie: Bruised Toe Lacing Technique Step 1. Completely remove the lace from the shoe. Step 2. Thread one end of the lace from the eyelet nearest to your big toe diagonally up to the top eyelet. Leave enough lace so the shoe can be tied. Step 3. Thread the other end of the lace across to the opposite eyelet and then back and forth toward the top of the shoe. Note: If you have problems with any of your other toes, you can thread the laces in reverse order to relieve pressure. |
Hot Spot Lacing
Fix: Friction, Chafing and Hot Spots on Foot
In addition to wearing running shoes with breathable mesh uppers, the hot spot lacing technique helps alleviate pressure points on your foot to avoid friction and chafing. If you have pain on the top of your foot, you can skip a set of eyelets to relieve pressure on the hot spot and avoid irritation.
|
How to Tie: Hot Spot Lacing Technique Step 1. Start by unlacing the shoe to below the spot where you're feeling the irritation. Step 2. Instead of lacing diagonally over the hot spot, bring the lace directly up the shoe on both sides for as long as it takes to avoid the hot spot. Step 3. Continue the diagonal lace pattern until you reach the top of the shoe. |

Lacing Tips for a Comfortable Run
Like the perfect bow on a beautifully wrapped present, lacing adds the finishing touch to your running toolkit. Properly lacing your running shoes helps avoid discomfort and can improve your performance. Additionally, different lacing patterns can help change the tension and fit of the upper of a shoe, offering support where you need it most. Ultimately, the best lacing method is unique to your foot type. Here are some other quick tips for a more comfortable run:
|
• Start with the appropriate running shoes, ensuring you have the right size and fit (whether you have narrow, standard, or wide feet). • Avoid over-tightening your laces, which can stop blood flow and lead to injuries, instep inflammation, tendonitis, and other serious issues. • Adjust your laces mid-run on longer distances, as your laces naturally stretch and loosen over time. • Periodically replace worn-out laces. • Focus on lacing to relieve pressure points. • Tie double knots to prevent laces from coming undone when running. • Always untie laces before putting on or removing your shoes to avoid worn-out heel counters. |
FAQ
1. What is the best way to tie your running shoes properly?
The best lacing method is whichever feels most comfortable for you. Your shoes should feel snug in the heel and midfoot, with some wiggle room for your toes. The top eyelets on each side of the tongue should run parallel. Test out different lacing methods to determine what feels best and alleviates any pressure points on your feet. If you are experiencing any issues with heel slippage, tight pressure, bruised toes, or blisters, please refer to the appropriate videos and lacing techniques above.
2. Should running shoes be tied tight or loose?
Your laces should feel snug and comfortable, not too tight that it causes pressure on the foot (which can lead to loss of circulation), but not too loose either that your feet are moving around a lot, which can cause blisters and lead to injury.
3. How do you tie your running shoes so the laces don't come undone?
For added security, we recommend double knotting your laces to prevent your shoelaces from becoming untied during your run.
4. How to lace running shoes to prevent blisters?
The Runner's Loop, also known as "Heel Lock," is an effective lacing method for avoiding blisters, helping to prevent your heel from rubbing against the back of the shoe and your toes from hitting against the toe box. If you're experiencing any irritations, the Hot Spot Lacing technique will also help alleviate friction. Please refer to the videos above for a step-by-step lacing guide. Additionally, wear moisture-wicking performance socks and use anti-chafe products on your feet for extra protection.
5. How to lace shoes for wide feet?
To provide more space for wider feet, you can use the Ladder Lacing technique, also known as Parallel Lacing, which offers a more spacious feel across the top of the foot. Please refer to the Parallel Lacing video above for a step-by-step guide. If you find that your toes are still feeling smushed or you have any existing foot conditions, such as bunions, then you will need a wide-width shoe, which will offer you the most comfortable and accommodating fit.
6. How to lace shoes for narrow feet?
If you have narrow feet, experiment with different lacing combinations and techniques above to address the issues you are facing when running. If you're experiencing heel slippage, the Runner's Loop will help provide a secure hold, minimizing movement. In addition, consider wearing shoe inserts that will fill out the shoe and help provide a more secure fit. If your low-volume feet are still moving around, look for a narrow-width sizing option for a snug fit.
Related Articles